PAPER QUILLING
The Magic of Quilling: How I Discovered Art in Twisted Paper
I still remember the first time I picked up a thin strip of paper, rolled it between my fingers, and watched it take shape. At first, my quilling designs looked more like tangled loops than elegant patterns, but with patience, I started seeing the magic unfold. Quilling, an ancient art of rolling and shaping paper, isn’t just about making beautiful designs—it’s a calming, creative escape.
In this blog, I’ll share everything you need to know about quilling, from the basics to unique design ideas. Whether you’re a beginner or someone looking for new inspirations, you’ll find something exciting to try. So, grab your paper strips and let’s dive into the world of quilling!
WHAT IS IT ?
Paper quilling or paper filigree is an art or craft form where the artist creates intricate designs by shaping and gluing narrow strips of paper. This art requires patience, neatness and a lot of time, but produces amazingly beautiful results that can be used for a variety of purposes: item decorating, handmade greeting cards, three-dimensional miniatures, pictures and even jewelry.
Paper quilling, also known as paper filigree, is the art of rolling narrow strips of paper into coils or scrolls and arranging them to form elegant filigree.
Quilling: The Ancient Papercraft Making A Comeback
The Rise, Fall and Rise Again
For some reason, in the following centuries, it became unpopular with art lovers before enjoying a brief resurgence with niche craft makers in the 70s and 80s and then fizzling out again. It does appear to be making a comeback again, and hopefully, this time, it catches on with the larger population and remains for good.
Today, quilling is now used for decorating wedding invitations, for Christmas, birth announcements, greeting cards, scrapbook pages, picture frames, and mobile phone cases.
Quilling’s latest resurgence has also brought with it advanced techniques and special sized paper that can be utilized to create 3D miniatures, abstract art, flowers, and portraits, among many things. It is also now combined or married with other techniques such as embroidery and painting.
Quilling in the 21st-century quilling
Quilling’s comeback in the 21st century has taken a more practical format, with many contemporary designers focusing on functionality rather than just ornamentation. We examine some of the quilling formats that have become popular with its latest resurgence.
Wearable Art: apparently, quilling artists (and their clients) must have said to themselves, why spend all that time creating these art pieces if you are only going to have it hung up in a fixed place at home?
Why not show it off in the good old way by making it into jewelry. And so, one place where quilling is finding a new life is in wearable art.
Thankfully a host of new tools and techniques now allow quillers to create a variety of new shapes and endless intricate arrangements that make quilling the perfect choice for a DIY jeweler.
MATERIAL YOU NEED
Essential Materials:
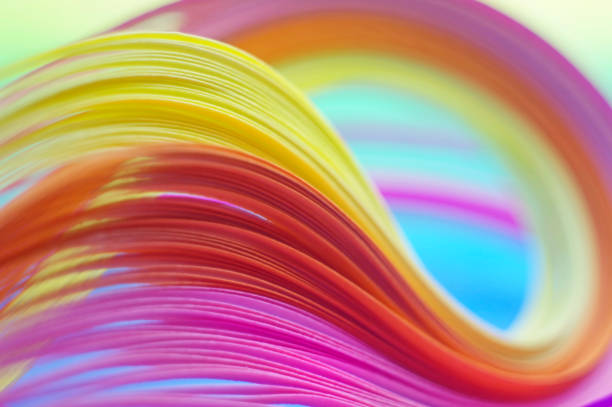
Quilling Paper:
Pre-cut quilling strips are readily available in various colors and widths.
You can also cut your own strips from sheets of paper, but pre-cut strips are easier for beginners.
Consider using different types of paper like metallic or dual-toned for added effects.
Quilling Tool:
A needle tool or a slotted tool is used to roll and shape the paper strips.
A toothpick or wooden dowel can also be used as a substitute for a quilling tool.
Glue:
Use a clear-drying glue that’s suitable for paper.
A needle-nosed glue bottle or a glue palette can help with precise application.
Scissors:
For cutting paper strips and shaping quilled pieces.
Ruler:
To measure and cut paper strips accurately.
Optional Materials:
Tweezers:
Helpful for handling small coils and working in tight spaces.
Cutting Mat:
Provides a stable surface for cutting paper strips.
Non-stick work board, cork, or styrofoam:
Something into which you can stick pins.
Specialized Quilling Tools:
Crimper, border buddy, curling coach, fringing scissors, spiral bloom stencil, quilling comb, quilling mould.
Quilling Board:
Provides templates for creating consistent shapes and sizes.
To create quilling patterns, start with basic shapes like coils, then glue them onto a background to form a design. Here’s a step-by-step guide:
- Gather Materials:
Quilling paper strips (various colors and widths).
Quilling tool (or a needle, cocktail stick).
PVA craft glue.
Background paper (card blanks, envelopes).
Optional: Quilling comb or needle form. - Create Basic Shapes:
Coil: Insert the end of a quilling strip into the tool and roll it tightly, then allow it to expand.
Tight Coil: Glue the end of the strip to create a tight, compact coil.
Other Shapes: Experiment with different shapes like teardrops, triangles, and squares by manipulating the coils. - Plan Your Design:
Arrange the quilled shapes on your background paper to create your desired pattern or image.
Consider the placement, size, and color of each shape. - Glue and Secure:
Apply a small amount of glue to the back of each quilled shape.
Carefully place the shapes onto the background paper in the planned arrangement.
Let the glue dry completely. - Experiment and Practice:
Try different quilling techniques and patterns to expand your skills and creativity.
Use colorful backgrounds and various quilling paper widths to create unique designs.
Creative Ideas for Paper Quilling
Now that you know the basics, let’s explore some creative ideas to spark your imagination:
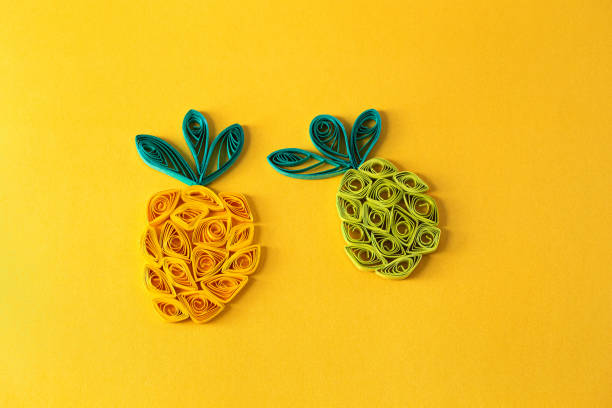
- Greeting Cards: Quilled designs make beautiful additions to handmade greeting cards. Create flowers, animals, or even abstract patterns to add a personal touch to your cards.
- Jewelry: Paper quilling can be used to make unique and lightweight jewelry. Earrings, pendants, and brooches with quilled designs are eye-catching and stylish.
- Home Decor: Decorate your living space with paper quilled art. Frame your creations and hang them on the wall, or design colorful coasters and table centerpieces.
- Personalized Gifts: Quilled items make for wonderful personalized gifts. Create a name or initial in quilled letters, or design a special keepsake for a loved one.
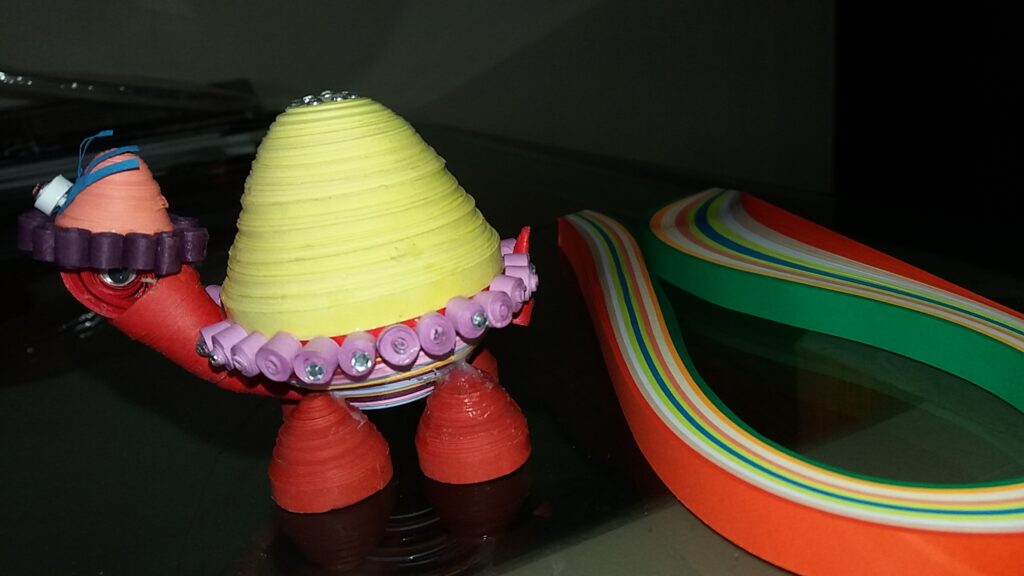
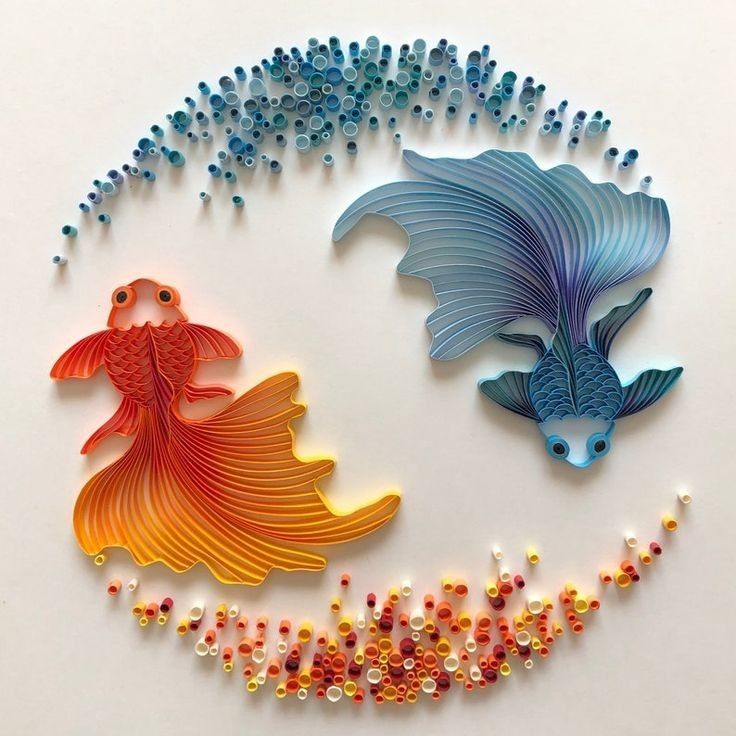
- 3D Sculptures: Take your quilling to the next level by creating 3D sculptures. You can make animals, flowers, and other objects with depth and dimension.
- Quilling Comb Technique: This technique involves using a quilling comb to create intricate designs like flowers and snowflakes.
- Quilling with Typography: Experiment with quilling to create letters, words, and quotes to display as wall art or gift items.
Paper quilling is a versatile and relaxing art form that allows you to express your creativity in many ways. Don’t be discouraged if your first attempts aren’t perfect – quilling takes practice. Remember that there are no rules in art, so let your imagination run wild, and have fun with it!
Hi, this is a comment.
To get started with moderating, editing, and deleting comments, please visit the Comments screen in the dashboard.
Commenter avatars come from Gravatar.